Bituminous gutter boundary and/or open end sealing kit
Format: pdf

Bituminous gutter boundary and open end sealing kit (BJS____)
For use with Plygene guttering systems.
Part number BJS14 for concrete and other types of gutters.
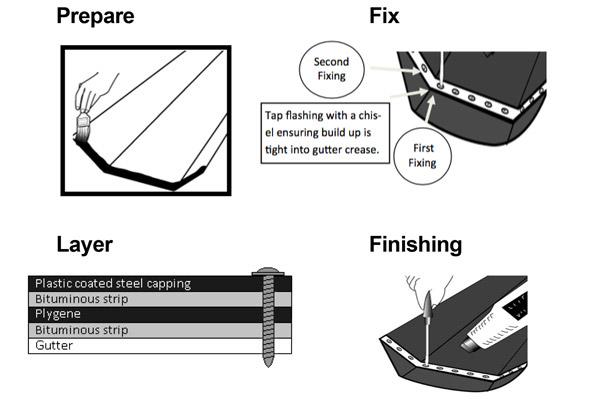
1. Prepare
- First, clean the gutter down to its original base material and ensure the concrete is level right across the gutter (grind out irregularities if necessary) at the point where the kit is to be fitted.
- Paint this area with high penetration bitumen primer and allow to dry.
2. Layer
- Place the first bituminous strip across the width of the prepared area.
- On top of this first strip, place the Plygene (extend the liner 50mm beyond the strip, don’t cut flush).
- Place the second bituminous strip on top of the liner.
- Place the pre-punched plastic coated steel strip on top of all the layers.
3. Fix
- Use the plastic coated steel strip as a guide and fix, starting from the base then working up the sides of the gutter.
- Drill right through all the layers, using the fixings specified for the gutter substrate (do not fully tighten).
- Remember to drill and fix one hole before moving on to the next one.
4. Finishing
- Use heat from either a hot air welding gun such as a Leister or paint stripper gun to help warm the bitumen.
- When the bitumen starts to ooze, fully tighten the fixings.
- As the fixings are tightened, make sure the bituminous strips and all other surfaces are in contact with each other.
- When the bitumen cools you should have a watertight seal between the original gutter and the Plygene – this will prevent any water backtracking and getting underneath the liner.
This kit comprises:
- 2 x bituminous strips
- 1 x pre-punched metal strip
- Specified fixings to suit gutter substrate and width
Function: Boundary joint sealing kit fitting instructions
Type: Technical documents
